Welcome to the third edition of “Ye olde raid guide”. This will be a series of posts covering everything you need to know to clear old raids at max level. We continue with the dreaded Blackwing Lair raid.
Blackwing Lair
“Dreaded?” you might ask, here’s why:
- The first boss has a mechanic that cannot be ignored that need to be carried out just like in the days when the raid was new or you will all die.
- Before Cataclysm, the trash spawning in the first boss room would just continuously spawn after the encounter for seemingly 10 minutes before you could continue forwards.
- There’s a room with traps in it that will slow you down to a pace that is slower than walking that you’ll spend another 10 minutes in just trying to move forwards. That is, unless you have a rogue.
- Up until patch 3.2 in Wrath of the Lich King, you needed to bring Onyxia Scale Cloak even at level 80 to avoid dying from the dragon bosses.
- Nefarian, the last boss, has specific class debuffs that will mess you up. Hunters for example will have their ranged weapons go from 100% durability to 0% a few times during the encounter (and yes, you’ll have to pay for the repairs)
Two of those problems are no more, as you can see. The others are just minor deterrents compared to the great potential benefits of entering and clearing the raid. Other than the personal and guild achievement there’s the chance of picking up some valuable Elementium Ingots and sexy Tier 2 gear.
To enter this raid via the orb you need to have done the attunement by walking through Upper Blackrock Spire, check my guide for Upper Blackrock to learn the details of the attunement.
- Wowpedia link

Nefarian
- Location: Blackrock Mountain
- Size: 40-man
- Level: 60
- Attunement: Blackhand’s Command
- Bosses:
- Why would you want to go there:
- For the achievements:
- Blackwing Lair (personal)
- Blackwing Lair (guild)
- For the quest:
- For the rare drops:
- Tier 2 gear
- Elementium Ingot – reagent for Thunderfury and some Ahn’Qiraj gear
- Goblin’s Guide to Elementium for Miners
- Some bad ass looking weapons such as Ashkandi, Greatsword of the Brotherhood
- Other:
- Hunters can tame the second to last boss, Chromaggus for a completely unique model of a Core Hound.
- For the achievements:

 There’s only one way to go; forward. Don’t worry about getting lost. 🙂
Walkthrough
You enter the raid via the orb outside the Blackrock Spire (for those who are attuned) or by walking through Upper Blackrock Spire. Alternatively you could get in via a warlock summon but that requires your warlock to be attuned and at least two other people. In my experience, warlocks are never attuned, the bastards. 🙂
Razorgore the Untamed
Once inside you immediately face Razorgore. And here you need to pay attention because if you don’t complete the encounter mechanics as intended, you will die.

Razorgore, wiping you
To the left in the big hall there will be an orb guarded by a few weak mobs. This orb is used for mind controlling Razorgore. Have one of the people in the raid (preferably someone with experience) on it. Classes with pets can sometimes have issues here if their pets are out, so make sure any pets are dismissed. The goal of the mind controller is to use Razorgore’s “Destroy Egg” ability on every single egg in the room. Once all of them are gone you can release the mind control and destroy Razorgore himself. If you attempt to kill Razorgore before ALL of the eggs are gone, he will wipe the raid (regardless of if there are 40 of you, all level 85’s in tier 13 armor).
Everyone else needs to keep the spawning adds away from Razorgore and the mind controller so neither of them dies. Also the mind controller cannot be knocked backed or interrupted, because it’ll cause the channeling mind control to end and leave the mind controller with a debuff that makes them unable to start mind controlling again for X seconds. If this happens, have a second person take over the mind controlling for the time being.
Once all eggs are down and you’ve pimpslapped Razorgore in the face, most of the raid will be smooth sailing. Keep moving forwards out of Razorgore’s room into Vaelastasz’s room.
Vaelastrasz the Corrupt
When entering Vaelastrasz room you’ll find some goblins running away, you can ignore them but it’s more fun chasing them down and killing them, isn’t it?
Nowadays you can nuke Vaelastrasz down within seconds if you have a few people but there are two things you should know. Firstly, he’ll cast Burning Adrenaline on random mana users and the tank every 45 seconds, which will cause them to do double damage and to die after 20 seconds (unavoidable). Secondly he’ll cast Essence of the Red on everyone just before the encounter which basically means unlimited mana/rage/energy/focus for everyone.
Nuke away!
Broodlord Lashlayer
After Vaelastrasz you’ll walk up some stairs and into a room of dragonkin which you’ll kill easily and quickly. After that you’ll go up some more stairs and get into the Halls of Strife. This is the room of eternal walking or where your rogues make him or herself useful, depending on if you have a rogue or not.
There will be a series of traps in the room and the room above that can be disarmed by rogues who are stealthed. If the traps aren’t disarmed and you are near them you will suffer a 80% movement speed reduction while being swarmed by never ending trash spawns. The trash itself is perfectly harmless nowadays, but the walk will be very slow. So I strongly recommend you having a rogue go in first to disarm the traps for you.
Once you slowly moved your way through the two rooms you’ll face Broodlord Lashlayer which is a regular tank and spank. The only thing you should be concerned with is that he can do a pretty substantial knock back, so attack him with your back against the wall so you don’t risk getting pushed back into the slow area or even worse, down into the previous room.
Firemaw, Ebonroc and Flamegor
The next set of rooms are full of Blackwing Technician mobs, these all have a chance of dropping Elementium Ingot and the Goblin’s Guide to Elementium (smelting pattern for miners) ans lots of Hourglass Sand (which you should pick up). Another noteworthy mob is the Blackwing Spellbinder which can only be killed by physical attacks since they are immune to spells.
Here you will also face the patrolling dragon bosses Firemaw, Ebonroc and Flamegor. These should all be dealt with in the same way, just have the tank face them away from the raid and nuke ’em dead. After these puny dragons you face the most awesome core hound of them all, Chromaggus.
Chromaggus

Chromaggus
If you looted the mobs in the previous rooms you should have a bunch of Hourglass Sand by now. This consumable is used for removing one of Chromaggus debuffs Brood Affliction: Bronze which will stun you for four seconds at random intervals for 10 minutes. This is of course highly annoying even at level 85, so make sure everyone has some sand to use on themselves.
Chromaggus will cast four other Brood Afflictions which are all irrelevant now at our current level. However, if a person gets all five afflictions on them at the same time that person will get transformed into a drakanoid and be mind controlled for the remainder of the encounter. Therefor it’s important to have a person dispelling the debuffs now and then so people don’t get mind controlled. The debuffs come in the flavors, magic, poison, curse, etc. So any class that has a dispel mechanic should be able to remove something.
Hunters can tame Chromaggus to get the most wicked looking core hound pet in the game right now. Bring some haste buffs and a heroism bot (shaman, mage) with you if you want to increase your chances of success.
You can engage Nefarian after taming Chromaggus and thus the achievements are still available for everyone who is there to help you.
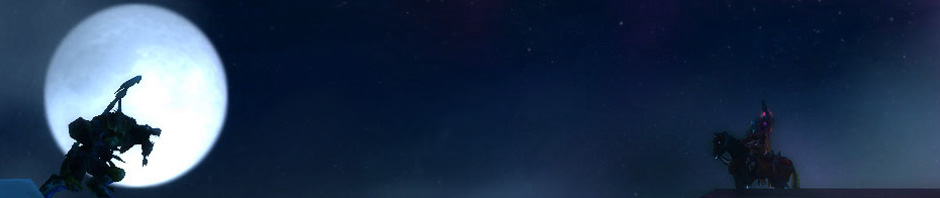
Nefarian
After Chromaggus only Nefarian remains. Go up to him sitting on his throne and tell him to go suck it and he’ll get mad at you and summon waves of skeleton adds. You’ll be killing them for a few minutes and after that Nefarian comes at you in dragon form. This used to be a real challening fight at level 60 but of course now it’s trivial. Just tank and spank.

Nefarian
Nefarian will however do his best to try and annoy you all before he gets defeated. He has these class specific debuffs:
Taken from Wowhead:
Class Debuff: Every 25-35 seconds, he will “call out” a class, afflicting every player of that class with a specific debuff.
- Druids are forced into Cat Form for 30 seconds by Involuntary Transformation.
- Hunters have their equipped ranged weapons instantly broken.
- Mages are transformed into a giraffe, cow, or worm by Wild Polymorph.
- Priests are afflicted with Corrupted Healing, causing the targets of any direct heals they cast to be debuffed by Corrupted Healing, dealing 44 to 56 damage every 1 sec, stacking up to 50 times.
- Paladins receive Siphon Blessing, forcing them to continuously cast 0 on Nefarian.
- Rogues are teleported in front of Nefarian and immobilized, leaving them open to his Cleave and breath attacks.
- Shamans will be under the effect of Corrupted Totems, summoning powerful versions of the Shaman’s various totems that will buff Nefarian and damage the raid.
- Warriors will Berserk, forcing them into a modified Berserker Stance, increasing damage taken.
- Warlocks will be forced to Summon Infernals, summoning two Corrupted Infernals per warlock to start attacking the raid.
Unfortunately for us hunters, Nefarian will just straight-up break our ranged weapon. Make sure to bring a set of ranged weapons, a Jeeves or as the commenter Eric suggested below; bring an heirloom bow, because heirlooms can’t break.
That’s it, you’ve defeated Blackwing Lair!
Quick Raid Leading Notes
Razorgore
- Needs to be mind controlled using the orb. The mind controller then proceeds to destroy all the eggs in the room. Unless all the eggs are destroyed the whole raid will be killed.
- Have another person ready to take over the orb-controlling or it might bug and you’ll all feel the wipe.
Broodlord Lashlayer
- Have your rogue sneak ahead and disable a straight line of the traps. Everyone should follow the rogue a bit behind him, not too close. If the rogue gets “in combat” then he won’t be able to disable more traps infront of you. Adds will respawn pretty quickly here, so don’t worry about killing them all until you’re reaching the end. In other words, it’s a gauntlet event. Oh and if you don’t have a rogue to disable the traps, you’ll be walking forwards veeeeeery slowly.
- People should have their backs against the wall, since the boss does knockback attacks.
Chromaggus
- If you’re a very small group, then this will be difficult. He’ll put lots of debuffs on everyone that needs to be cleansed/dispelled.
- One of the debuffs, “Brood Affliction: Bronze”, will stun the player for 4 seconds, repeatedly for 10 minutes. The only way to dispel it by using Hourglass Sand that you looted from the goblin mobs before Firemaw.
Cheers,
Gav


 Rapid Fire RSS Feed
“Unfortunately for us hunters, Nefarian will just straight-up break our ranged weapon. Make sure to bring a set of ranged weapons or a Jeeves.”
…
Not my original idea (saw this on a different website, can’t recall the source), but another way around this is to use an heirloom ranged weapon. All heirlooms are exempt from damage/durability loss and never need repair… thus they circumvent this fight mechanic rather neatly.
Good tip!
Pingback: WoW Summer Challenge: Blackrock Mountain | Singleplay3r