Welcome to the fifth edition of “Ye olde raid guide”. This is a series of posts covering everything you need to know to clear old raids at max level. We continue with the Temple of Ahn’Qiraj raid.
Temple of Ahn’Qiraj
This raid is commonly referred to as AQ40 and unlike AQ20 (now AQ10), this is actually still a valid title since the raid is still 40-man.
Temple of Ahn’Qiraj is fairly easy to complete with a group but there are a few nasty areas that you really need to be prepared for to avoid wiping. Yes, you can absolutely still wipe here.
For some history on the Gates of Ahn’Qiraj event, check out this WoW Insider article.
 Wowpedia link
- Location: Silithus
- Size: 40-man
- Level: 60
- Attunement: None
- Bosses:
- The Prophet Skeram
- Bug Trio: Yauj, Vem & Kri
- Battleguard Sartura
- Fankriss the Unyielding
- Viscidus
- Princess Huhuran
- Twin Emperors: Vek’lor & Vek’nilash
- Ouro
- C’Thun
- Why would you want to go there:
- For the achievements:
- Temple of Ahn’Qiraj (personal)
- Temple of Ahn’Qiraj (guild)
- Guardian of Cenarius – Exalted with Cenarion Circle
- Brood of Nozdormu – Exalted with the faction
- Why? Because It’s Red – Mount
- For the quest:
- For the (rare) drops:
- Blue Qiraji Resonating Crystal – Mount
- Green Qiraji Resonating Crystal – Mount
- Yellow Qiraji Resonating Crystal – Mount
- Red Qiraji Resonating Crystal – Rare mount
- Vanquished Tentacle of C’thun, a trinket that summons tentacles.
- Shard of the Fallen Star, a trinket that summons meteors upon your enemies.
- Enchanting formulas (these all drop in AQ10 too):
- Enchanting formulas unique to AQ40:
- Tokens and scarabs for class-specific loot that makes up the 5-piece Tier 2.5 set.
- Other:
- For the achievements:


You will need to defeat most of the bosses on the way to get to C’Thun but there are three that you can skip; The bug trio, Viscidus and Ouro.
People tend to get lost here, which is odd because there’s really just one way you can go… Maybe it’s because of the rooms and walls all looking very similar throughout most of the dungeon that causes disorientation. But don’t worry about that, just keep moving forward and you’ll be fine.
Walkthrough
Skeram and Insignias
In the beginning of Temple of Ahn’Qiraj you will face The Prophet Skeram who splits up into three now and then and sometimes mind controls his enemies. If you are just one or two, this could get tricky. But with a group this is easily and quickly done. Don’t forget to have every person in the group loot him for his insignia – this applies to every boss in this raid.
Behind the first boss you will find some NPCs, handing out quests. You will wanna come back to these guys once you’re done with the raid to hand in all the insignias dropping from every boss (even when there are two or three bosses in the same encounter). Turning in the insignias will reward you with reputation with both Brood of Nozdormu and Cenarion Circle.
The Bug Trio
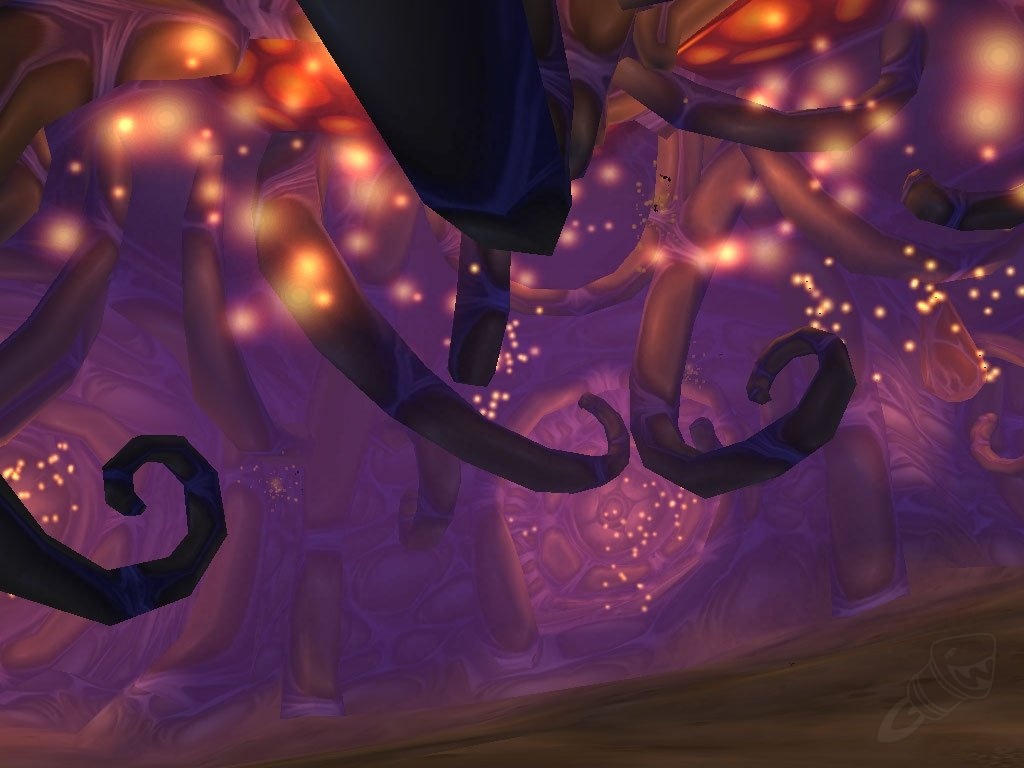
The interior of the hive
Once you feel you’ve spent enough time staring at the NPCs it’s time to head down into the depths of Ahn’Qiraj. Once you’ve come down the stairs and turned around to go down into the cave you will first wanna take a turn to the right if you want to destroy the optional bosses; Yauj, Vem & Kri (the bug trio). Or take a turn to the left to proceed to the next boss. If you are there to gain reputation, killing the optional bosses will net you more reputation and is therefor advisable.
The bug trio can still cause serious harm because they will throw you up in the air and when you hit the ground you will receive fall damage (which is always a percentage of your health). The throws are also a bit random, so you can actually sometimes receive 100% damage and just die from a single throw. Healers, be on your toes.
To kill the trio you attack one bug at a time and kill them off one by one. When a bug dies, the other two gains health again, so it’s not beneficial to attack all three at once.
Further into the hive (Sartura & Fankriss)
Once the bug trio is dead and all the insignias have been looted it is time to turn around and go back the way you came. After having gone up the ramp you should see another path that leads further into the Ahn’Qiraj hive – If you see the stairs you’ve gone too far.
Following this path you will eventually bump into Battleguard Sartura which you will effortlessly nuke down. Behind him you will walk through a gauntlet (an area where mobs continuously spawn) of zillions of bugs. Be sure you all stick together for this one to avoid unnecessary deaths. After the gauntlet you’ll meet Fankriss the Unyielding, which you will also effortlessly nuke down.
Viscidus & Princess Huhuran

Viscidus
Behind Fankriss lies the main path forward but also a small opening in the wall to the left. If you enter through there you will meet the optional boss; Viscidus. This guy is a bit special, to kill him you not only have to dps him down to 0% health but you also need to freeze him and then melee him to cause the ice to crack.
So, first you dps him down to 1 health (at which point he won’t lose any health anymore) and then everyone in the raid will have to use their frost abilities to freeze him to a solid ice block. This is still tuned for 40-man raiding so this can be very difficult to actually achieve. If you don’t have several frost mages and frost death knights, this will most likely be impossible.
Once he’s at 1 health and frozen, everyone needs to melee him to cause him to crack and explode. Yes, even hunters and casters should melee.
Most likely you will have to skip Viscidus and just go further into the hive. The next boss ahead is Princess Huhuran which you will also effortlessly nuke down, if you’re in a group. If you’re on your own you will spend a few hours here due to all the stuns slowing you down.
The Twin Emperors
Up next is the most dreaded boss in all of classic raiding, the twin emperors: Vek’lor & Vek’nilash. To defeat this boss you will have to convince your group that tactics are actually serious business for this one boss and that they should listen. This will most likely be very difficult and you might spend 10-20 minutes here before people actually listen.
- Vek’lor (left side) – Immune to physical damage, have all but one caster on him. One of the casters should be “tanking” him. Have one melee here too.
- Vek’nilash (right side) – Immune to magical damage, have all but one melee and hunters on him. Have one caster on this side too.

Vek'nilash & Vek'lor
The Twin Emperors have to be kept apart from each other (at the opposite sides of the big room) to not heal each other to full every second – This mechanic cannot be facerolled through with “imba dps”.
To make things difficult for you, the brothers switch places every 30 second by teleporting. When this happens there is a complete aggro wipe. If you have any dots or debuffs on a boss at this point, that will be the main source of aggro. So for example, You have your casters putting dots on Vek’lor and your melee putting bleeds on Vek’nilash and they switch place, the bosses will immediately start running towards each other across the room to get to the people who gave them the dots or bleeds, since that’s the biggest threat on them now. In the process both bosses will be healed to full and everyone will get really frustrated.
So, rule number one: NO DOTS. Once you’ve managed to convince your raid to not use a single dot, the fight will be quickly and easily done.
It is important that you have at least one physical damage dealer on the caster side and one magical damage dealer on the melee side to be able to tank the bosses when they switch sides. If you have exclusively melee’s on one side and exclusively casters on the other side, then no one will be able to efficiently aggro the other boss when they switch places.
Ouro
After the Twin Emperors only two bosses remains. The first one is Ouro, which is optional and therefor skip able. He is however very easy, so there’s no real need to skip him. Just nuke him dead and enjoy the loot. You reach him by entering his own cavern to the left when following the main path. After him you go back out and further up the circling path.
C’Thun
You’re now on the last boss, the old god C’Thun. Back in the day you could expect to wipe horribly due to a million different mechanics, but of course now since we out-level it so greatly, there isn’t much to be concerned about here.
Have one person run in on his own first, to take the Eye Beam to the face for almost no damage. If you all stack up and run in at once this ability can still kill you and you wouldn’t like wiping on the last boss in this instance all that much since the trip back to him would take you about 15 minutes. If you are less than 7 people the damage won’t be deadly, but 7 (96k damage per target) or more (at 8 people, 192k damage per target) will most likely end the encounter for you.
Once you’ve managed to enter the room without wiping, the rest is fairly easy. Just dps him and his tentacles and avoid big red beams. Once you kill him he will, instead of dying, enter phase 2. During this phase his damage taken is reduced by 99%. At this point you can slowly kill him by simply dpsing him, but the intended method is to have the people who get swallowed by him kill the tentacles inside his stomach which causes him to lose the reduced damage taken buff and become vulnerable to attacks.
Note: If you do get into the stomach, be careful not to stay in there too long since you will eventually die from the stacking debuff. If you die in there, no one can resurrect you. To get out you step on the little platform-looking area to get pushed out through his mouth.
That’s it, you’ve defeated one of the old gods of Azeroth and clearead up the bug problem in Ahn’Qiraj!
Hopefully you leave with your very own red bug mount
The loot of Ahn’Qiraj
Both Ahn’Qiraj raids drop scarabs, idols and tokens. These items make up the collector mini-game that are all used for assembling the two different gear sets related to these raids. Scarabs often drop off random trash mobs and you can find more of them in the Scarab Coffers spread out all over the raids, you can find keys for these coffers off random trash mobs as well. Also dropping from mobs and coffers are idols, these are a lot more rare however and you will most likely only find them in coffers. The tokens drop off bosses. In Ruins of Ahn’Qiraj you have all the possible tokens dropping from every boss while in Temple of Ahn’Qiraj you have a specific set of tokens assigned to specific bosses.
With the items found in Ruins of Ahn’Qiraj you can assemble the 3-piece Cenarion Circle set and with the items found in Temple of Ahn’Qiraj you can assemble the 5-piece Brood of Nozdormu set (also known as Tier 2.5).
To assemble the full Cenarion Circle set you need to be exalted with Cenarion Circle and to assemble the full Brood of Nozdormu set you need to be honored with the faction with the same name. You can earn reputation for both these factions by killing mobs and bosses in both the Ahn’Qiraj raids.
Quick Raid Leading Notes
- Remember to loot all the bosses for their insignias (even if there were two or three in the encounter) if you’re looking to increase your Brood of Nozdormu and/or Cenarion Circle reputation.
Viscidus
- Skip Viscidus if you don’t have a massive amount of frost mages or frost death knights. He needs to be dpsed down to 0% health and then frozen by frost abilities and once frozen, meleed to death.
Twin Emperors
- Don’t allow anyone in the raid to use dots since it makes the encounter impossible to complete.
- Have all but one of the melee and hunters on the right and all but one of the casters on the left.
- Have one caster on the right and one melee on the left.
- Keep the bosses apart to avoid having them heal each other.
C’Thun
- Don’t all run in at once since it will most likely wipe you if you are 7 or more and guaranteed to wipe you if are 8 or more. Also, don’t die in the stomach, it’s not a pleasant death.
Cheers,
Gav


 Rapid Fire RSS Feed
I wished I played more during BC. I’ve never even seen the insides of AQ. Maybe I should go look for old content runners 🙂
Anyways, great guide!